Do your ankles feel stiff? Does your heel lift off the ground when you squat? You are not alone.
Limited ankle mobility is a common hidden problem. It can stop you from reaching your fitness goals. It can also lead to pain in your knees, hips, and back. This guide will show you how to improve ankle mobility. We use principles of biomechanics. This is the science of human movement. You will learn why your ankles are stiff. You will learn how to test them. You will get a clear plan to increase ankle flexibility and move without pain.
Why Ankle Mobility Matters: More Than Just Your Ankles

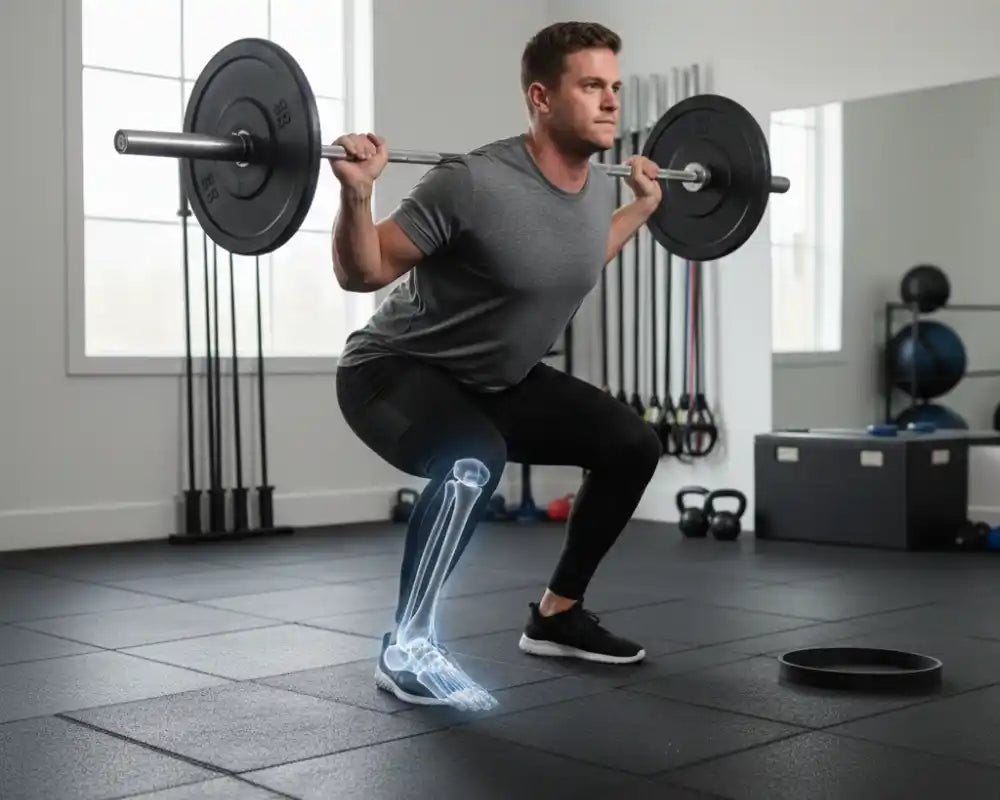
Your ankle is a complex hinge joint. Its main movement is dorsiflexion. This is when you pull your toes toward your shin. Good dorsiflexion is non-negotiable for basic human movement.
Think about walking, running, or climbing stairs. Now think about a deep squat. Your shins must move forward over your feet. If your ankle mobility is poor, your body must compensate. It will find movement somewhere else. Often, this means your foot rolls inward or your knee caves. This places stress on joints that are not designed for it.
A study in the Journal of Strength and Conditioning Research found that limited ankle dorsiflexion can alter squat mechanics. This increases injury risk. Improving your ankle mobility is not just for athletes. It is for anyone who wants to move well for life.
Explore More: How to Use Ankle Straps for Cable Machines to Boost Your Workout
Test Your Ankle Mobility at Home
Before you start, know your starting point. The Knee-to-Wall Test is a simple, effective ankle mobility test you can do at home.
- Face a wall. Place your toes about 5 inches away from it.
- Keep your heel flat on the floor. Gently drive your knee forward. Try to touch the wall with your knee.
- Your knee must travel in line with your second toe. Do not let it collapse inward.
- If you can touch the wall without your heel lifting, move your foot back. Find the maximum distance where you can still touch the wall. Measure this distance.
A good benchmark is 5 inches or more. Ankle dorsiflexion of less than 4 inches indicates limited ankle dorsiflexion. This test shows your available range. It is your baseline. Use it to track your progress as you perform ankle mobility exercises.
Your Biomechanics-Based Plan to Increase Ankle Flexibility
Most plans stop at stretching. This one progresses logically. We start by improving joint sliding, then lengthen tight muscles, and finally strengthen the new range. That sequence creates lasting change, not just a temporary stretch.
Phase 1: Joint Mobilisation (Improve the Slide)
Tightness is often in the joint capsule itself. These drills create space.
Banded Ankle Dorsiflexion Mobilization:
Loop a resistance band around a stable post, placing the other end just above your ankle bone. Step forward to create tension. The band pulls the shin bone back, creating a distraction at the joint. From here, perform a slow knee-to-wall stretch. The band helps glide the joint into a deeper range of motion. Hold for 2-3 minutes per side to directly tackle limited ankle mobility.
Ankle Circles for Control:
Don't just warm up. Perform ankle circles with intention. Lift your foot and draw the largest circle you can with your big toe. Move slowly. Explore your full range. Ten circles, clockwise and counterclockwise, wake up the nervous system and improve control around the joint.
Phase 2: Tissue Lengthening (Improve Ankle Flexibility)
Now we address tight muscles. The main culprit is often the calf complex.
Deep Calf Stretch for Ankles:
Place the ball of your foot on a raised surface, such as a weight plate or step. Keep your heel on the floor. Keep your knee straight to stretch the gastrocnemius muscle. Then, bend your knee slightly to target the soleus muscle deeper in the calf. Hold each position for 45-60 seconds. Feel the stretch in your lower calf, not your arch. This is a foundational stretch to increase ankle flexibility.
Loaded Dorsiflexion Stretch:
Get into a half-kneeling position with your front foot flat on the ground. Gently drive your knee forward over your toes. Hold onto something for balance. Add a light weight on your knee for a gentle, passive stretch. Hold for 1-2 minutes. This position closely mimics the ankle angle needed for a squat.
Phase 3: Strength & Integration (Make it Stick)
The new range is useless without strength. These exercises build control.
Eccentric Calf Raises:
Stand on a step with your heels off the edge. Rise onto your toes, then shift your weight to one leg. Take 5 full seconds to lower your heel down below the step level. This eccentric (lengthening) strength is crucial for stability. Complete 3 sets of 8 slow reps per side.
Deep Squat Hold with Assistance:
Integrate everything by holding onto a sturdy pole. Lower yourself into the deepest squat possible while keeping your heels down. Use your arms only for light support. Hold for 30-60 seconds. Focus on breathing and relaxing into the stretch. This is the ultimate application of your new ankle mobility for squats.
Also Read: The 7 Best Ankle Strap Cable Exercises for Glutes and Legs
Special Focus: How to Increase Ankle Mobility for Squats
For lifters, this is the critical question. Ankle mobility for squats is the difference between a good squat and a great one. It allows for an upright torso. This protects your spine. It lets you achieve proper depth safely.
If you want to improve ankle mobility specifically for lifting, prioritize the banded mobilisation and the loaded dorsiflexion stretch. Perform them as part of your warm-up before every lower-body session. Consistency here is key. Over time, you will notice your heels staying down more easily. You will feel more solid in the bottom position.
Unlock Your Movement Potential
Learning how to improve ankle mobility is an investment in your body's longevity. It enhances performance in the gym. It also improves your quality of movement in daily life. Start with the test. Follow the phased plan. Be patient and consistent. Your body will thank you with every pain-free step and powerful squat.
Ready to support your new mobility with premium equipment?
Master the banded mobilisations shown in this guide with Body Reaper Resistance Bands. Engineered for durability and consistent tension, they provide the safe, reliable resistance you need to stretch your limits and build lasting change.
Recommended Gear


Leave a comment
This site is protected by hCaptcha and the hCaptcha Privacy Policy and Terms of Service apply.